Guardian
Guardian Management is typically used by schools to manage parent information and family contact details. Through guardian management, schools can establish complete and accurate family-based information collections. Well-maintained guardian information helps schools maintain constant communication with family units, such as sending notifications, tuition bills, health information, emergency alerts, and more.
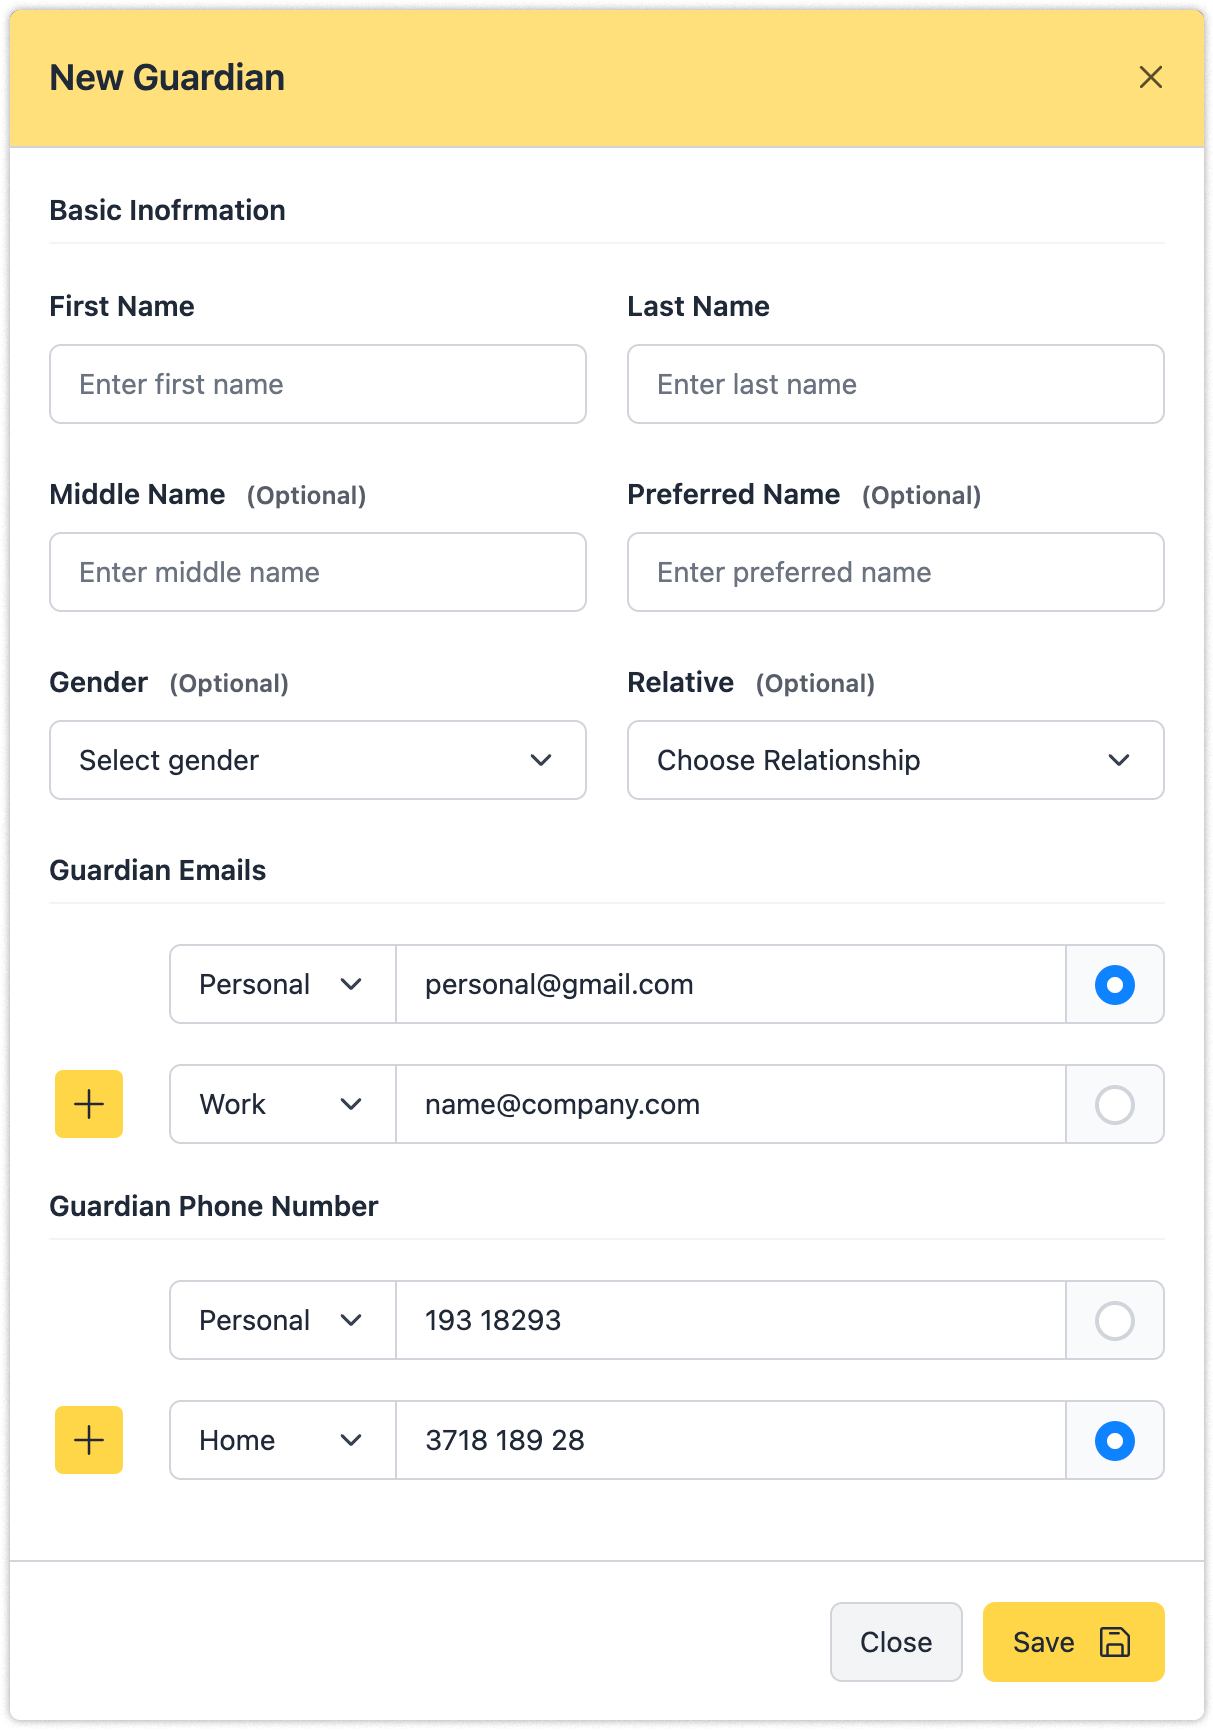
Create New Guardian
Each receipt contains the following essential information:
- Serial Number: Corresponds to the identifier printed on physical copies or registered in government digital systems
- Payer Information: Individual parent name or company entity making the payment
- Payment Date: Official date when the transaction was processed
- Associated Account: Financial account to which the payment is allocated
- Currency: Denomination in which the payment was received
- Remarks: Supplementary notes or special conditions related to the transaction
Procedure:
- Access your Scholar OS account with your credentials.
- Select the Admission Pro module from the main dashboard.
- Navigate to the Enrollment section.
- From the left sidebar, select the appropriate School Year.
- Utilize the search function to locate the student by ID number or name.
- Select the student's ID to access their complete profile.
- On the right sidebar, select the Receipt option to proceed.
Modify Guardian Information
Each receipt contains the following essential information:
- Serial Number: Corresponds to the identifier printed on physical copies or registered in government digital systems
- Payer Information: Individual parent name or company entity making the payment
- Payment Date: Official date when the transaction was processed
- Associated Account: Financial account to which the payment is allocated
- Currency: Denomination in which the payment was received
- Remarks: Supplementary notes or special conditions related to the transaction
Procedure:
- Access your Scholar OS account with your credentials.
- Select the Admission Pro module from the main dashboard.
- Navigate to the Enrollment section.
- From the left sidebar, select the appropriate School Year.
- Utilize the search function to locate the student by ID number or name.
- Select the student's ID to access their complete profile.
- On the right sidebar, select the Receipt option to proceed.
Remove Guardian Information
Each receipt contains the following essential information:
- Serial Number: Corresponds to the identifier printed on physical copies or registered in government digital systems
- Payer Information: Individual parent name or company entity making the payment
- Payment Date: Official date when the transaction was processed
- Associated Account: Financial account to which the payment is allocated
- Currency: Denomination in which the payment was received
- Remarks: Supplementary notes or special conditions related to the transaction
Procedure:
- Access your Scholar OS account with your credentials.
- Select the Admission Pro module from the main dashboard.
- Navigate to the Enrollment section.
- From the left sidebar, select the appropriate School Year.
- Utilize the search function to locate the student by ID number or name.
- Select the student's ID to access their complete profile.
- On the right sidebar, select the Receipt option to proceed.
Delete Guardian Information Permanently
Each receipt contains the following essential information:
- Serial Number: Corresponds to the identifier printed on physical copies or registered in government digital systems
- Payer Information: Individual parent name or company entity making the payment
- Payment Date: Official date when the transaction was processed
- Associated Account: Financial account to which the payment is allocated
- Currency: Denomination in which the payment was received
- Remarks: Supplementary notes or special conditions related to the transaction
Procedure:
- Access your Scholar OS account with your credentials.
- Select the Admission Pro module from the main dashboard.
- Navigate to the Enrollment section.
- From the left sidebar, select the appropriate School Year.
- Utilize the search function to locate the student by ID number or name.
- Select the student's ID to access their complete profile.
- On the right sidebar, select the Receipt option to proceed.